Table of Contents
Reflective Summary/Introduction
Section I: Professionalism
Critique Reflection
Article 1: Resume
Section II: Creating Models with Advanced Modeling Techniques
Modeling Reflection
Article 1: Fireplace
Article 2: Western Canyon Project
Article 3: Nested Dodecahedron
Section III: Applying Materials, Shaders and Rendering Techniques
Aesthetics Reflection
Article 1: Neighborhood Project
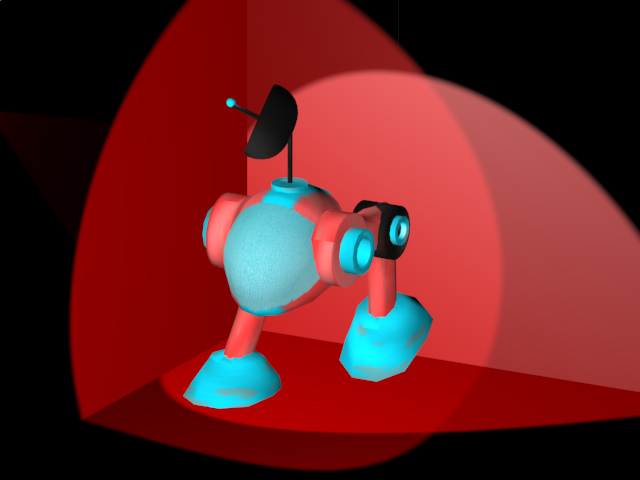
Article 2: UV Textured Mech
Article 3: Alleyway Wall Scene
Renderer Reflection
Section IV: Working with Lighting
Lighting & Shadows Reflection
Article 1: Materials & Lighting
Article 2: Theatre Lighting
Section V: Using Cameras to Animate a Scene
Reflection
Personal Showreel
Video Presentation
Conclusion
Section I: Professionalism
Critique Reflection
Article 1: Resume
Section II: Creating Models with Advanced Modeling Techniques
Modeling Reflection
Article 1: Fireplace
Article 2: Western Canyon Project
Article 3: Nested Dodecahedron
Section III: Applying Materials, Shaders and Rendering Techniques
Aesthetics Reflection
Article 1: Neighborhood Project
Article 2: UV Textured Mech
Article 3: Alleyway Wall Scene
Renderer Reflection
Section IV: Working with Lighting
Lighting & Shadows Reflection
Article 1: Materials & Lighting
Article 2: Theatre Lighting
Section V: Using Cameras to Animate a Scene
Reflection
Personal Showreel
Video Presentation
Conclusion
The Digital Design and Animation II Course is certainly an interesting, unique, and admittedly sort of difficult course to follow. This part of the Game Art and Design pathway is specifically all about 3d Modelling using a program called 3ds Max. We learn to model simple objects, use materials on our models to make them more interesting, how to combine objects to make much more complex things, and much, much more. Heck, if this year were to have gone normally, that is to say with no interference from COVID in fourth quarter from the last year, then we would've learned to do full-on animation in 3ds Max. Overall, if you are interested in following a career path that involves making 3d models, such as game design, then this is a go-to course for that path.
Section I: Professionalism
While putting significant effort and care into the works you make is very important, it is also important to remember just how vital it is to have the opinions of others factored in. Getting critiqued on what you do can help you figure out not only what you can fix, but also how to do things better. If you only work off of your own opinion, then it will be hard to satisfy others when you show them your things, since if you don't heed their advice on what to do better, then you may not actually improve. Thus you should remember to be open to criticism and other people's opinions, because then your odds of actually improving instead of staying stagnant are much higher. Though before I end this off, I will say that it is also important to remember your side of criticism. If someone else is doing something wrong, or that could be done better, give them good advice so that they can also improve. As important as it is to pay attention to what others say about your stuff, you should also pay attention to what you say about others' stuff, because then you may actually be able to help them to do better.
This is a Conceptual Resume I made a while back, with the contact information removed. Apologies for the slight blur there.
Section II: Creating Models with Advanced Modeling Techniques
There are definitely a few modeling techniques that are important to understand when using 3ds Max, because they can come in very, very handy. A prime example of that is the ability to combine objects to make compound objects, and for even more precision, the ability to cut shapes from other elements with the subtract ability. Both of those fall under tools like Proboolean, which is an easy-to-use bit of the program that is for combining objects, but also for cutting objects from others. Both of those little features can be used to make some very interesting things, since it means you can combine 4 boxes and one cylinder to make a table, for a simple example of combination, or you could cut some text into a box to make a sign with the subtract option. However, those aren't the only things you can do.
Just taking a step back, even the most baseline controls for moving and resizing objects are considered what is called parametric modeling. In the simplest terms, that just means that you're modifying numbers to get different results with the object. Of course, that is still just technically baseline controls, but there are other controls that run off of parameters, and are a lot more complicated. A prime example of that is the editable poly modifier, which expands on those baseline controls, in a sense. However, it also offers a lot more, such as making connections via 2 polygons of the same object with the bridge tool. Another control that is pretty much its own thing is the Turbosmooth modifier, which does exactly what it says in the name: make your shape much smoother via increasing the amount of polygons that it has. Now, with a few modifiers that come in very useful for making models without any lighting, shaders, materials, or anything like that, let's get to some of the artifacts to show just what they can be used for.
Just taking a step back, even the most baseline controls for moving and resizing objects are considered what is called parametric modeling. In the simplest terms, that just means that you're modifying numbers to get different results with the object. Of course, that is still just technically baseline controls, but there are other controls that run off of parameters, and are a lot more complicated. A prime example of that is the editable poly modifier, which expands on those baseline controls, in a sense. However, it also offers a lot more, such as making connections via 2 polygons of the same object with the bridge tool. Another control that is pretty much its own thing is the Turbosmooth modifier, which does exactly what it says in the name: make your shape much smoother via increasing the amount of polygons that it has. Now, with a few modifiers that come in very useful for making models without any lighting, shaders, materials, or anything like that, let's get to some of the artifacts to show just what they can be used for.
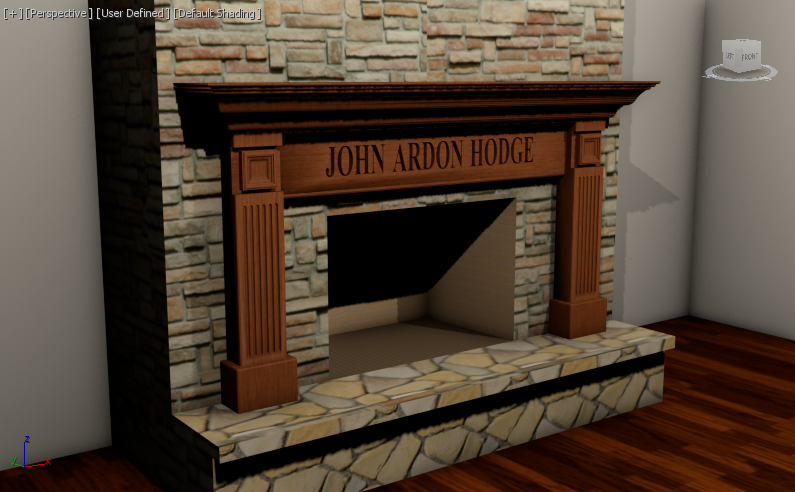
Proboolean-Based Fireplace, an assignment that helped me to understand how Proboolean works and how it can help with making your models look better.
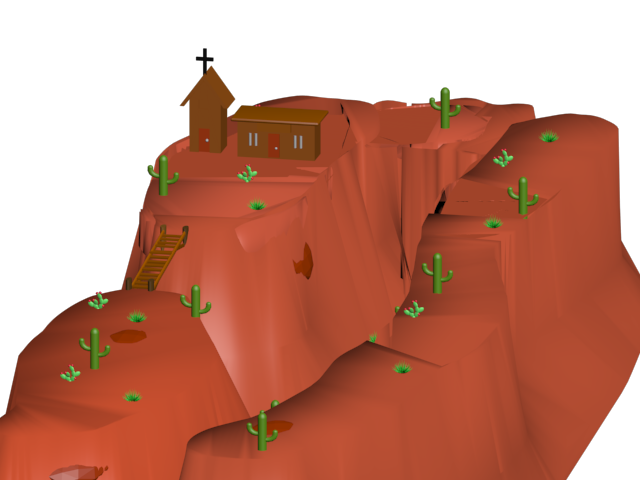
Western Canyon Project, an assignment that helped me understand more about compound objects and how to use a combination of splines and the terrain tool to make more complicated models.

Nested Dodecahedron, an assignment that allowed me to learn more about things like the Bridge Tool of the Editable Poly Modifier, as well as the Turbosmooth tool.
Simulations are also an integral part not only in modeling, but also much more so in game development. Simulations help to, as the name suggests, simulate how certain objects would work under real-world physics and the likes. MassFX is probably the most simple and prominent example of how this works, with 3 settings that can be applied to objects. Dynamic makes objects subject to gravity and movement from being struck by others, notably including cloth objects, static makes objects stay completely stationary no matter what happens to them, and kinematic is a sort of middle ground between the two. The Cloth Modifier is also a fairly simple, yet effective way to show how these things work, since if they are applied to objects, normally being planes, then if it hits any object assigned as a collision object, it will deform as if it were a cloth hitting that object.
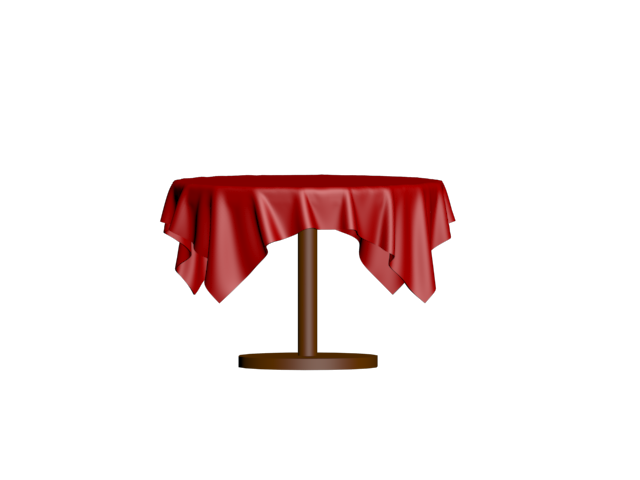
Table with a Tablecloth, made by me to help me understand a little more about how the Cloth Modifier actually works, and how it'd help with a game designer making objects that obey reasonable physics.
Section III: Applying Materials, Shaders and Rendering Techniques
Materials, Textures, Shaders and the likes are a critical part in making your models as realistic as possible. Materials are one of the best ways to pull this off, since they allow you to almost completely customize how a model looks based on what materials you assign to certain elements. The bitmap option for these materials is especially useful, since they are where the customization truly comes in when it comes to just materials. There is also the option to add texture to your materials with bump maps and things like that, while shaders are an effective way to make your model look better via, as the name suggests, putting shading on them. However, what is likely the best option when it comes to just materials is to add UVW Maps, since these allow you to get much more precision on what parts of a texture go where on the model, allowing for it to look significantly better and more realistic, but also allowing for less polygons, since the material's details would pull some of the legwork too.
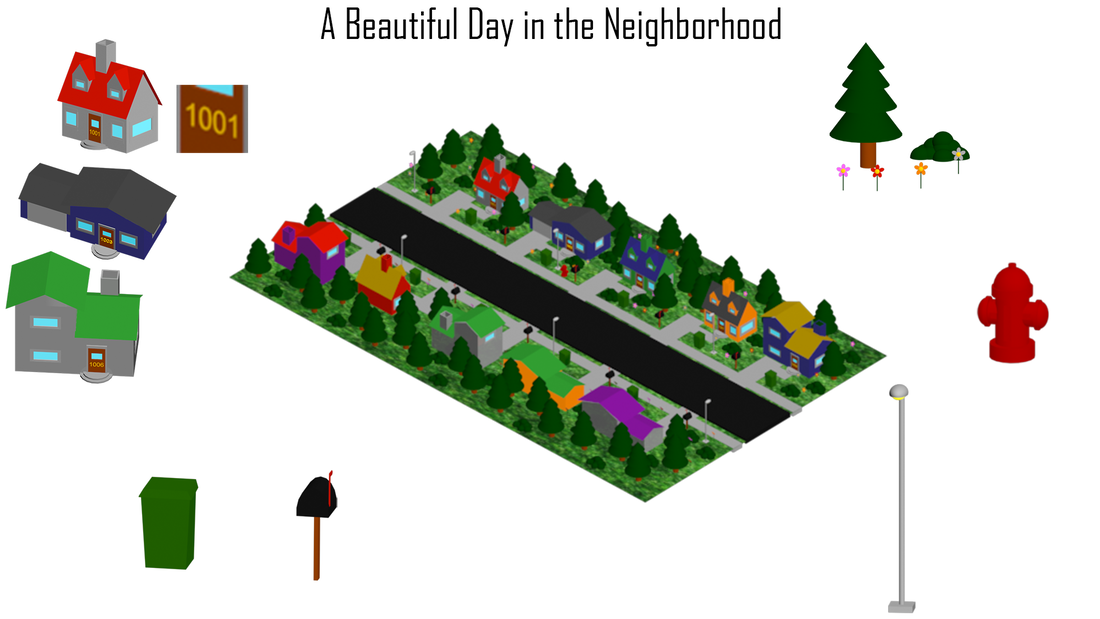
Neighborhood Project, an assignment that gave me a much better understanding on how materials work and how they can help make your models look better while also keeping them as compound objects, thus reducing some of the lag.
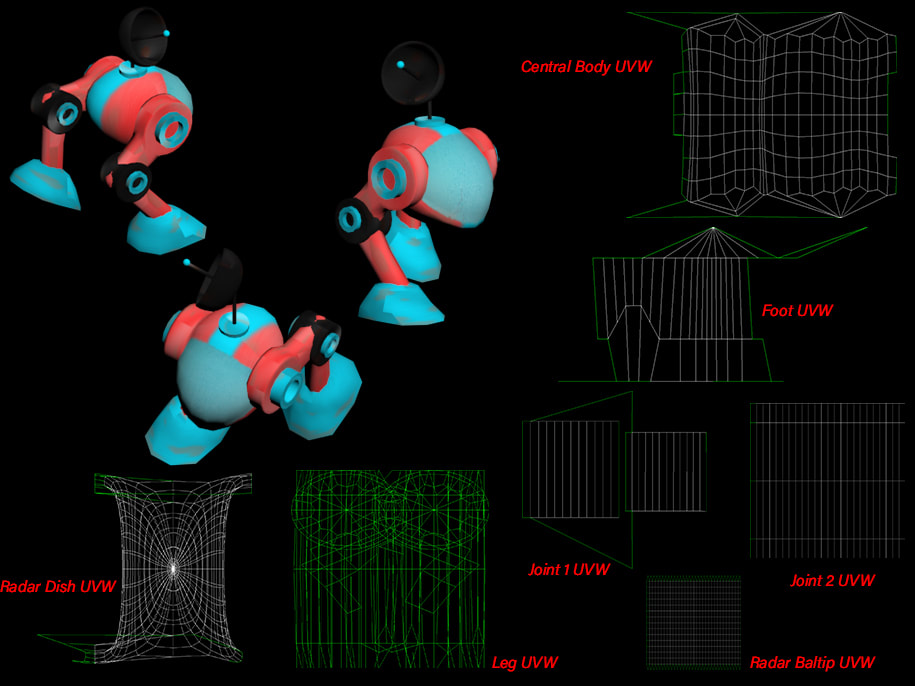
UV-Textured Mech, an assignment that was integral for understanding how UVW maps work and how they can be very useful in making models look much better and more realistic.
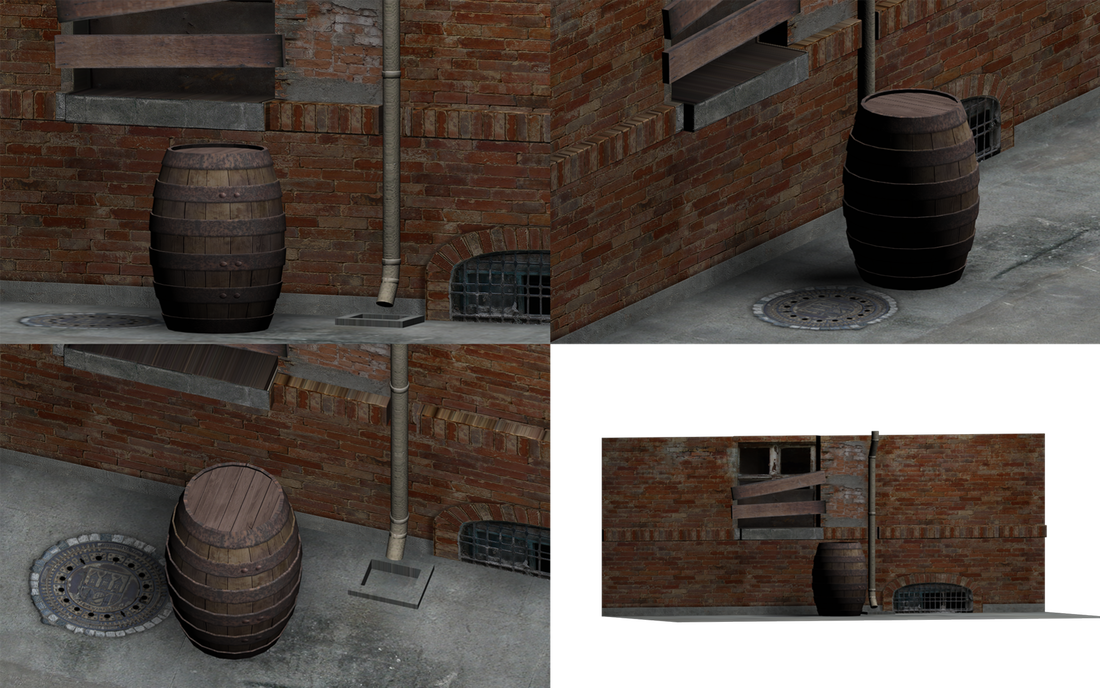
Alleyway Wall Scene, an assignment that was also integral in understanding UV Maps, but also helped me understand how Bump Maps can make your scenes look that much better.
While textures, shaders, and all of that stuff is a very important part of making your scene look good, even the way that you render it can make a very big difference on how it looks. Some renderers are able to register shaders and materials better than others, and others take up less RAM and less time, though don't look quite as good. The renderer is also a good way to be able to alter what output you get, whether it be a video file or one of the many photo files it can render as. Even if your priority isn't to make it look good, there is also an option to have all of the individual polygons show with the Quicksilver Renderer. In short, even without things like materials, textures and the likes, the renderer itself can make a big difference on how your scene comes out.
Section IV: Working with Lighting
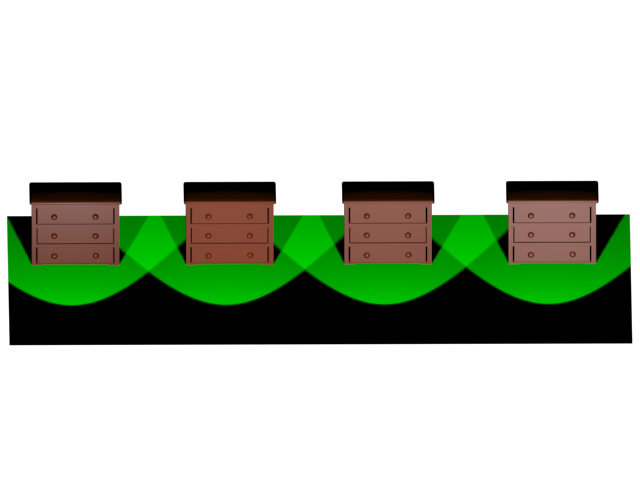
Of course, materials, textures, shaders and all of that are very important to making your scenes and models look better, but there is also the lighting itself that you put into it, and the shadows that are made as a result of it. The lighting is not only an important part because it effects how much people can see of your model, but it is incredibly important in actually creating the feel you want with your scene. Depending on what sort of feel and how bright you want your scene to be, you should use light accordingly to achieve those qualities. For some examples, if you want to simulate candle light, an omni light with fairly low intensity could achieve that effect very well. However, if you want to make a flashlight or spotlight, the aptly-named spotlight option is the best option for that. Of course, the color of the light is also a very important part in achieving the feel. If you want a happy, warm or just bright scene, warm colors are likely best, whereas a cold, creepy or eerie setting would best be achieved with lights of cooler color.
Materials and Lighting, an assignment that helped me to understand how glossiness can factor into the way that materials look on objects, as well as how shadows can make a model look a little more realistic.
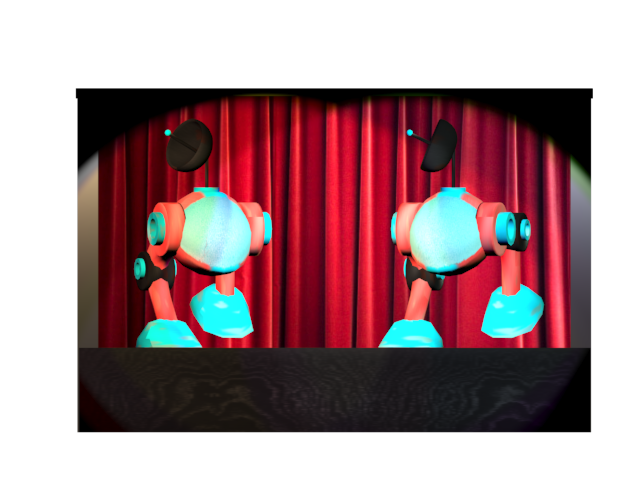
Theatre Lighting, an assignment that allowed me to learn a little bit about the best ways to make lighting that fits a certain setting.
3-Point Lighting, an assignment that helped me to understand the best ways to show off your 3D models in an efficient and nice-looking manner.
Section V: Using Cameras to Animate a Scene
One thing that I did end up learning regarding cameras when it comes to the real world versus in 3d Modeling is that they actually work in very similar ways. In both cameras, the aperture is a way to brighten or darken the photo via opening or closing the lens, and the ISO is a sort of counter for when the aperture gets too dark in both versions. However, at least in my case, my real-world camera did not have a Shutter Speed option, but the one in 3ds Max yielded some seriously strange results. Lighting also seems to work mildly similar when it comes to physical cameras in 3ds Max and cameras in the real world. The intensity of lights is a little bit hard to explain when it comes to comparison, but I'd say they work fairly similarly to each other, with the more intense light making things harder to see thanks to excess brightness. Now, without further ado, into the Showreel.
Oral Presentation
As a sidenote, I apologize for the low quality, as my computer's camera definitely is not the best.
Conclusion
To end off this whole thing, I'm just going to talk about how this whole thing has changed me. Making this specific part of the Portfolio has allowed me to reminisce on just how much has happened over the past year, despite the constraints put forward by COVID. I'm honestly sort of surprised about how far we've gotten even with the online restrictions, even if an entire unit and part of the first had to be left out of actual teaching. However, the entire class has also had an effect, since not only has it taught us a lot about 3D Modeling, but it's gotten almost everyone in the class that much closer to being able to develop their own video games. That fact honestly feels really cool and strange to me. I'm glad that I'm now able to use a lot of 3ds Max's materials to even make my own models, which was the case for the mechanical skeleton thing that I made a little while ago, as well as his strange little mask. I really am just happy that I was able to attend this course and learn about as much as I possibly could from it considering this year's constraints. Anyway, that is all I really have to say, so I'll end it off here. I hope to continue this pathway with success and happiness.
